
Prep & Skincare
The foundation of any show-stopping look starts long before you open your makeup bag. Clean skin is non-negotiable if you want your face-beating to truly shine. Gently cleanse with a pH-balanced cleanser that removes impurities without stripping your skin’s natural moisture barrier. This step removes the day’s buildup and creates a clean canvas that lets every product adhere properly.
After cleansing, apply a lightweight hydrating serum loaded with hyaluronic acid or glycerin. These humectants draw moisture into the skin and plump fine lines from the inside out. Give the serum about sixty seconds to fully absorb before moving on. Next, lock everything in with a rich but fast-absorbing moisturizer that nourishes your skin throughout the day.
Once your moisturizer sinks in, smooth a silicone-based or hydrating primer across your entire face. Primer fills in pores and fine texture, creating a slightly tacky surface that helps foundation cling evenly. For oily skin, opt for a mattifying formula; for dry skin, choose a dewier base. This prep step is what separates a flawless beat from one that settles into creases by noon.
- **Cleanser**: pH-balanced, gentle formula
- **Hydrating serum**: hyaluronic acid or glycerin
- **Moisturizer**: nourishing cream suited to your skin type
- **Primer**: silicone or hydrating based on skin needs
Base & Concealer
Choosing the right foundation shade is the single most important decision in your base routine. Test shade along your jawline in natural daylight — it should disappear into your skin without an ashy or orange cast. Liquid foundation works best for normal to dry skin, while those with oily complexions often prefer a lightweight, oil-control formula. The goal is sheer-to-medium coverage that looks like your skin, only better.
Application technique matters just as much as product selection. Use a damp makeup sponge or a dense buffing brush to stipple foundation onto the skin in light layers. Build coverage gradually rather than applying one thick coat. This technique prevents the dreaded cakey appearance and ensures seamless blending along your hairline, jaw, and ears.
Concealer comes next, applied only where you need it — under the eyes, around the nose, and over any blemishes. Use a smaller sponge or concealer brush to dab product directly onto problem areas, then blend outward using light tapping motions. Finally, dust a translucent loose powder across your T-zone and under your eyes to lock your base in place. Press powder into skin rather than sweeping it across to avoid disturbing your concealer.
- **Foundation**: shade-matched liquid or matte formula
- **Application tools**: damp sponge or buffing brush
- **Concealer**: full-coverage, crease-resistant formula
- **Setting powder**: translucent loose powder
Eyes
Eyes are where face-beating really comes alive. Start with a neutral-toned eyeshadow applied across your entire lid as a base coat. This unifies your eyelid tone and gives the subsequent layers something to grip. Use a flat shader brush to pack the color on, focusing most of the pigment in the center of the lid.
Next, define your crease using a slightly darker matte shade. Use a fluffy blending brush and small, gentle circular motions to diffuse the color along your orbital bone. This step adds depth and dimension without looking heavy. If you prefer a softer look, stick to warm browns and mauves; for a more dramatic beat, reach for cooler greys or charcoal tones.
Eyeliner application determines the overall energy of your eye look. For a sharp wing, draw a thin line along your upper lash line and then extend the tip at an angle. Fill in the shape for maximum opacity. Finish with two coats of volumizing mascara on both upper and lower lashes. Wiggle the wand at the root to deposit maximum product where it creates the most impact.
| Eyeshadow Application Tools | Best For |
|---|---|
| Flat shader brush | Packing color onto the lid |
| Fluffy blending brush | Diffusing crease shades |
| Small detail brush | Inner corner and lower lash line |
- **Base eyeshadow**: neutral matte shade
- **Crease shade**: slightly darker matte or satin
- **Eyeliner**: liquid or gel formula for sharp lines
- **Mascara**: volumizing formula with curved wand
Brows
Well-shaped brows frame your entire face and anchor your makeup look. Before filling in, determine your natural shape by holding a straight edge from the corner of your nostril to the brow tail — this gives you a guide for where your brow should end. Use small, hair-like strokes with a brow pencil or pomade to fill in any sparse areas.
Choose a shade that matches your natural brow color or sits one shade lighter for a softer finish. Avoid hard, blocky lines by using a spooley brush to blend the product through your brows immediately after application. This softens any harsh edges and distributes pigment evenly across all the hairs.
Once your brows are shaped and filled, lock them in place with a clear or tinted brow gel. Apply using upward and outward strokes to lift and separate the hairs for a feathery, voluminous appearance. This final step prevents smudging and ensures your brows stay pristine throughout an entire day or night.
- **Brow pencil or pomade**: matches natural shade
- **Spooley brush**: blends and softens product
- **Brow gel**: clear or tinted for all-day hold
Cheeks
Cheek color brings life and dimension to your face-beating routine. Smile naturally to locate the apples of your cheeks, then apply a creamy blush using your ring finger or a stippling brush. Dab the product onto the center of the apple and blend upward toward the temple using light, circular motions. Cream blush melts into the skin for a lit-from-within glow.
Contouring adds structure and depth to your face shape. Use an angled contour brush to apply a cool-toned bronzer along the hollows of your cheeks, starting from your ear and dragging toward the corner of your mouth. Blend thoroughly to avoid any stripey application. Contour should be subtle — you want to sculpt, not to carve.
Highlight finishes the cheek trio by drawing light to the highest points of your face. Apply a champagne or pink-toned highlighter to the tops of your cheekbones, the bridge of your nose, and your cupid’s bow. A soft glow contrasts beautifully with your contour and gives your skin a healthy, luminous finish.
| Cheek Products | Finish | Best Application Tool |
|---|---|---|
| Cream blush | Dewy, natural | Stippling brush or finger |
| Powder bronzer | Matte or satin | Angled contour brush |
| Liquid or powder highlighter | Luminous, reflective | Fan brush |
- **Cream blush**: warm pink or coral tone
- **Contour bronzer**: cool-toned, matte finish
- **Highlighter**: champagne or rose gold
Lips
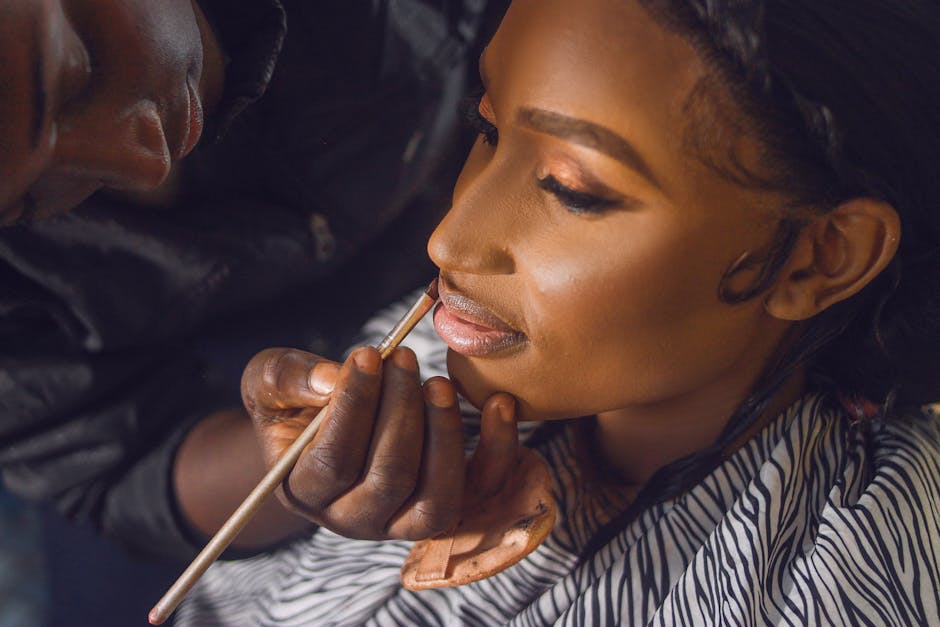
Lips deserve their own moment in any face-beating tutorial. Begin with a gentle lip scrub to slough away dead skin — this creates a smooth surface free of flakes that can disrupt your lip color. Follow with a hydrating lip balm and allow it to absorb for a minute before blotting away any excess.
Lip liner is your secret weapon for long-lasting lip color. Outline your natural lip shape using small, featherlight strokes, then fill in the entire lip area. This technique creates a base layer that prevents feathering and extends the wear time of your lipstick. Choose a liner that matches your lip color or your chosen lipstick shade for the most seamless result.
Finish with a high-pigment lipstick or gloss applied directly from the bullet or with a lip brush for precision. For all-day wear, blot your lips once and apply a second layer; for a glossy effect, add a clear or tinted lip gloss on top. Glossy finishes reflect light and make lips appear fuller, while matte formulas deliver high-impact color that commands attention.
- **Lip scrub**: gentle exfoliating formula
- **Lip liner**: long-wear, matches lipstick
- **Lipstick or gloss**: high-pigment matte or shine finish
Setting Spray
Setting spray is the final step that seals your entire face-beating look for all-day wear. Not all setting sprays are created equal — those with a matte finish control shine for oily skin types, while hydrating setting sprays add a dewy finish for dry complexions. If you have combination skin, look for a balanced formula that controls oil without drying out your cheeks.
Hold the bottle about eight to ten inches from your face and spritz in an X-pattern across your features. This distance ensures fine mist particles rather than large droplets that can disrupt your makeup. Allow the spray to air dry completely without fanning or touching your face. As it dries, the mist coalesces to form a flexible film that bonds all your layers together.
A good setting spray extends makeup wear from hours to an entire day, preventing transfer onto clothing and maintaining color vibrancy through meals and mild activity. Some formulas even offer added benefits like pore-minimizing effects or light fragrance for an elevated sensory experience.
- **Matte setting spray**: controls oil and shine
- **Hydrating setting spray**: adds dewy glow
- **All-day setting spray**: locks in all layers
Frequently Asked Questions (FAQ)
What is face-beating in makeup?
Face-beating is professional makeup artist slang for applying a full, glamorous makeup look from start to finish. It refers to the complete process of preparing the skin, layering color products, and setting everything in place for a polished, camera-ready result.
How long does it take to master face-beating techniques?
With consistent practice, most people can develop confident face-beating skills within two to four weeks. The key is dedicating time to practice each individual step — blending, layering, and product selection — until the techniques feel natural and intuitive.
What are the essential tools for face-beating?
Every face-beating kit should include quality brushes or sponges for application, a hydrating primer, a well-matched foundation, a concealing concealer, eyeshadow palettes in neutral tones, a brow pencil or pomade, cream and powder cheek products, lip liner, and a reliable setting spray.
Explore more makeup tutorial guides on our site.
Top Product Recommendations
| Product Name | Rating | Key Feature | Est. Price | Action |
|---|---|---|---|---|
| Top-rated hydrating serum for face | ★★★★★ | Editor-recommended hydrating serum for face from this guide | $18–$42 | Check Lowest Price on Amazon |
| Best-value translucent setting powder | ★★★★☆ | Affordable translucent setting powder — strong everyday results | $12–$28 | Check Lowest Price on Amazon |
| Premium volumizing mascara | ★★★★☆ | Higher-end volumizing mascara for visible, lasting results | $45–$95 | Check Lowest Price on Amazon |
Affiliate Disclosure: This post contains affiliate links. We may earn a commission if you buy through our links, at no extra cost to you.