
Prep & Skincare: The Foundation of Flawless Face-Beating
Every stunning full-glam look begins long before you reach for your concealer. The secret that professional makeup artists swear by is proper skin preparation, and it truly is the make-or-break step that separates a flawless face-beating from a cakey, uneven finish. Starting with a clean canvas is absolutely essential, so begin your routine by double cleansing your skin to remove any traces of dirt, oil, or residue from the day. This two-step cleansing process ensures that your skin is genuinely clean, smooth, and ready to absorb the hydrating products that follow.
Once your skin is thoroughly cleansed, it’s time to introduce a hydrating and nourishing serum into your routine. A lightweight, plumping serum works beautifully to deliver moisture deep into the skin while creating a supple, dewy base that helps your makeup glide on seamlessly. Pat the serum gently into your skin using your fingertips, allowing a moment for it to fully absorb before moving on to the next step. Well-hydrated skin not only looks healthier and more radiant, but it also creates the perfect texture for smooth makeup application that lasts throughout the day.
The final prep step involves applying a light, moisturizing primer that smooths out your skin texture and creates an even surface for foundation. Choose a primer that addresses your specific skin concerns, whether that’s minimizing pores, adding luminosity, or controlling oil. Apply it in thin, even layers across your entire face, paying special attention to areas where makeup tends to settle or fade fastest. This barrier between your skincare and your foundation ensures that your face-beating stays intact for hours without creasing, caking, or fading prematurely.
Base & Concealer: Building Your Flawless Canvas
The base and concealer step is where your face-beating truly comes to life, transforming your prepared skin into a smooth, even-toned complexion that looks naturally flawless. When selecting a foundation, opt for one with a natural, dewy finish that mimics the look of healthy, well-rested skin rather than a heavy, mask-like appearance. The goal is to enhance your natural beauty while evening out your skin tone, not to cover yourself in a layer of something that looks obviously applied. A lightweight, buildable formula gives you the control you need to achieve your desired coverage level without overwhelming your skin.
Blending is arguably the most critical technique in this entire makeup tutorial, and the tool you use makes all the difference in the world. A damp makeup sponge is the professional’s choice for seamlessly blending foundation into the skin, as the moisture helps the product melt into your pores rather than sitting on top of them. Bounce and stipple the sponge gently across your skin in upward motions, working from the center of your face outward for the most natural-looking blend. Take your time with this step, because rushed blending is one of the most common causes of an imperfect base that looks patchy or uneven.
Concealer should be used strategically rather than all over your face, as less is genuinely more when it comes to achieving a natural-looking finish. Apply concealer only where you need it most, such as under the eyes to brighten dark circles, around the nose to neutralize redness, and on any blemishes or areas of discoloration. Use your damp sponge or a small brush to gently blend the edges of your concealer into your foundation, feathering it out so there are no harsh lines or obvious demarcation points. The result should be a seamless, uniform complexion that looks like your best skin, not like you’re wearing a thick layer of product.
Eyes: Defining Your Gaze with Precision
The eyes are often called the windows to the soul, and in the world of face-beating, they are definitely the star of the show. For a versatile everyday look that works beautifully in any setting, start by applying a neutral, everyday shade across your eyelid as your base color. This doesn’t mean boring — think soft taupes, warm beiges, or gentle mauves that add subtle dimension without overwhelming your natural eye shape. Apply the shadow using a flat brush, packing the color onto your lid and blending it gently upward toward your crease for a polished, professional finish.
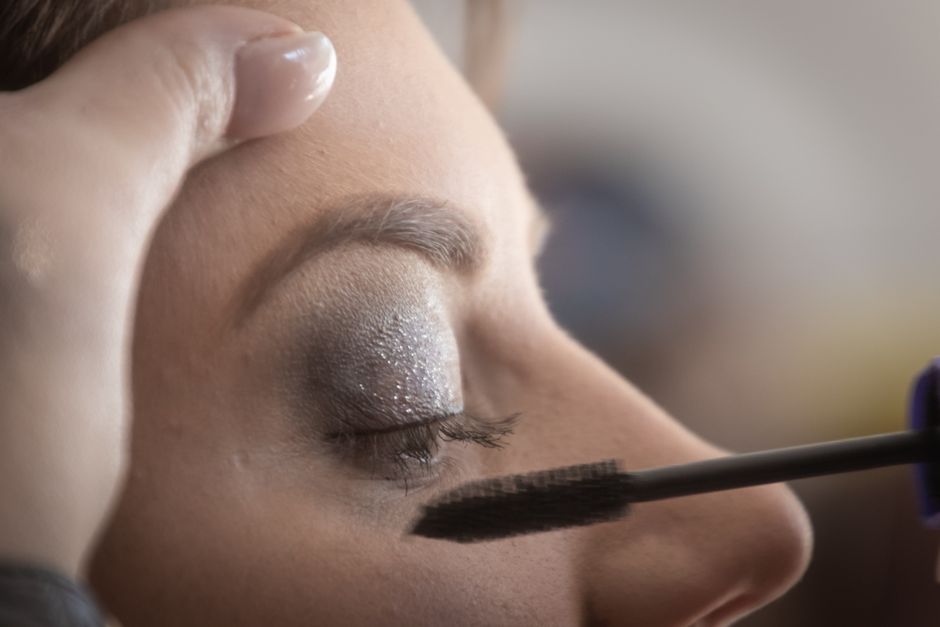
Mascara is the finishing touch that opens up your eyes and makes your lashes the envy of everyone in the room. For long, voluminous lashes that hold their curl throughout the entire day, reach for a waterproof mascara formula that won’t smudge, flake, or fade. Apply it in thin coats, waiting a moment between each layer to allow the product to build and thicken your lashes naturally. Wiggle the wand at the base of your lashes to deposit maximum product where it creates the most impact, then sweep outward toward the tips for beautiful, fanned-out length. This technique ensures your eyes look awake, bright, and defined without clumping or spidery-looking lashes.
Completing your eye look means filling in your brows with a natural-looking shade that frames your face and adds structure to your overall appearance. Your eyebrows should complement your natural coloring without looking drawn on or overly dramatic, so choose a shade that matches your natural hair color as closely as possible. Use short, feathery strokes with a spoolie brush or a fine-tip brow pencil to mimic the appearance of individual hairs, building the shape gradually rather than applying product heavily all at once. Well-groomed brows pull your entire face-beating together and ensure your eyes look polished and intentional.
Cheeks: Adding Dimension and a Healthy Glow
Cheek color is the secret weapon that transforms a flat, one-dimensional makeup look into something that appears fresh, dimensional, and genuinely alive. Cream blush is an exc nt choice for achieving that dewy, natural flush that looks like you just came in from a walk in cool air, as it melts into the skin beautifully and gives a lit-from-within radiance. Apply it to the apples of your cheeks and blend upward toward your temples using your fingertips or a damp sponge for the most natural, skin-like finish. The key is to blend while the product is still slightly tacky so it fuses seamlessly with your foundation rather than sitting on top of it.
Bronzer and highlighter are the dynamic duo that create dimension and sculpt your features without requiring the advanced skills of a professional contour artist. When applying bronzer, use a light hand and focus the warmth along the hollows of your cheeks, your hairline, and the perimeter of your face where the sun would naturally hit. A barely-there application is always better than going too heavy, as you can always build the intensity gradually but over-application creates a muddy, unnatural appearance that detracts from your face-beating rather than enhancing it.
Highlighter should be applied sparingly to the high points of your face where light naturally catches and bounces, such as the tops of your cheekbones, the bridge of your nose, your cupid’s bow, and the center of your forehead. Choose a highlighter with a fine shimmer that reflects light beautifully without containing large glitter particles that look obvious or chunky on the skin. The goal is to create a healthy, luminous glow that appears to come from within your skin rather than a glittery shine that looks like you applied craft supplies to your face. These three cheek products used together create the dimensional, sculpted look that makes professional face-beating so coveted.
Lips: Perfecting Your Pout
The final touch on any makeup tutorial is choosing and applying lip color that complements the rest of your look without competing for attention. Your lip shade should harmonize with the tones you’ve used on your eyes and cheeks, creating a cohesive overall appearance rather than a mismatched collection of colors. If your eye look is dramatic and bold, consider a more neutral lip, and if your eye makeup is soft and subtle, you have more freedom to play with a bolder lip color. The balance between your features is what makes a face-beating look polished and intentional rather than overdone.
How you apply lip product matters just as much as which shade you choose, and the technique you use can either enhance or detract from your natural lip shape. Rather than applying lip color carelessly all over your lips, take a moment to consider your natural lip shape and how you can accentuate its best features. Use a lip liner that matches your lip color or your chosen lipstick shade to define your lips precisely before filling in with color, which creates a clean, professional canvas that prevents feathering and bleeding. For a natural look, focus the color on the center of your lips and blend outward, building intensity gradually rather than applying a heavy opaque layer all at once.
Keeping your lip application looking natural and not overly done is a skill that comes with practice and restraint. Blot your lips gently with a tissue after the first application to remove excess product, then apply a second thin layer if desired for better longevity. Avoid overlining your lips significantly, as going outside your natural lip line creates an obvious, artificial appearance that undermines the rest of your careful face-beating work. The most beautiful lip looks appear as though they could be your natural lip color, enhanced just enough to look polished and put-together without announcing themselves as heavily applied makeup.
Setting Spray: Locking In Your Masterpiece
After investing all that time and effort into perfecting your face-beating, the last thing you want is for your makeup to slip, fade, or melt away within a few hours. Setting spray is the professional secret that locks in all your hard work and ensures your makeup stays looking fresh and flawless from morning until night. A lightweight setting spray creates a fine mist that settles over your makeup and bonds the products together, essentially sealing everything in place without adding any extra weight, shine, or texture to your look. It’s the final step that transforms your application from a beautiful but temporary result into a long-wearing masterpiece.
The technique you use when applying setting spray is just as important as choosing the right product for your needs. Hold the bottle approximately six to eight inches away from your face and mist evenly across your entire complexion in a light, even layer. Resist the urge to saturate your face with spray, as too much product can actually cause your makeup to become heavy, cakey, or create droplets that disrupt the smooth finish you’ve worked so carefully to achieve. A light, even application ensures that every part of your makeup gets sealed without any one area becoming overly wet or product-heavy.
After you’ve applied your setting spray, give your makeup a few minutes to set naturally before touching your face, applying any additional products, or exposing yourself to any situations that might disrupt your look. This brief waiting period allows the spray to fully bond with your makeup and creates the strongest possible seal that will carry you through your entire day or evening. Your face-beating is now locked in and ready to face whatever comes your way, whether that’s a long workday, an evening out with friends, or simply going about your daily routine with confidence and radiance that lasts.
Frequently Asked Questions (FAQ)
Do I need to use a primer for this makeup routine?
While a primer is not absolutely essential for applying makeup, it genuinely makes a remarkable difference in both the appearance and longevity of your final look. Primer smooths out your skin texture, fills in pores and fine lines, and creates a barrier that helps your foundation adhere better and wear longer throughout the day. If you have oily skin, look for a mattifying primer, and if you have dry skin, opt for a hydrating formula that adds moisture. Skipping primer is an option if you’re in a hurry, but your makeup will likely need touch-ups more frequently and may not look as smooth and flawless as it could with proper priming.
Can I use a different shade for my eyebrows?
Absolutely, you can choose a brow shade that differs slightly from your natural hair color, and in some cases, a subtle difference can actually enhance your overall look. The key is to stay within a reasonable range of your natural coloring rather than making a dramatic change that looks obviously artificial. Going too dark creates harsh, heavy eyebrows that overwhelm your face, while going too light can make your brows appear sparse or washed out. If you want to experiment with a different brow color, do so gradually and always assess how it looks from a normal distance before committing to the change for a full face-beating application.
How often should I change my makeup routine?
It’s a smart practice to reassess and refresh your makeup routine every few months to keep things feeling fresh and to ensure you’re using the best products for your current skin type and the season. Your skin’s needs change throughout the year due to factors like temperature, humidity, and indoor heating, and switching up your routine helps you adapt to these changes effectively. Additionally, makeup formulas and your own preferences evolve, so what worked for you last season might not be the ideal choice for today. Regular evaluation of your routine keeps your face-beating skills sharp and ensures you’re always putting your best face forward with products and techniques that truly work for you.
Explore more makeup-tutorial guides on our site.
Top Product Recommendations
| Product Name | Rating | Key Feature | Est. Price | Action |
|---|---|---|---|---|
| Best Makeup Tutorial Pick | ★★★★★ | Top-rated overall | $25–$45 | Check Lowest Price on Amazon |
| Budget Makeup Tutorial Option | ★★★★☆ | Great for beginners | $12–$28 | Check Lowest Price on Amazon |
| Premium Makeup Tutorial Choice | ★★★★☆ | Pro-level results | $50–$90 | Check Lowest Price on Amazon |
Affiliate Disclosure: This post contains affiliate links. We may earn a commission if you buy through our links, at no extra cost to you.