
The Ultimate Guide to Face-Beating Mastery: A Step-by-Step Makeup Tutorial
Whether you are a total beginner or someone who wants to sharpen their technique, mastering the art of a full-glam look starts with understanding the right sequence and the right methods. “Face-beating,” as professional makeup artists call it, is the process of applying and blending makeup to achieve a flawless, camera-ready finish. This comprehensive makeup tutorial walks you through every step — from skincare prep to the final mist of setting spray — so you can feel confident and look stunning no matter the occasion.
The key to a truly professional result lies in patience and technique, not in expensive products or complicated tools. By following this guide, you will learn how each step of the makeup process builds on the last one, creating a cohesive look that lasts all day. Let’s dive into the world of face-beating and break down exactly what it takes to achieve that seamless, beat-to-perfection glow.
Every great makeup look begins long before you open your eyeshadow palette. The canvas matters more than most people realize, and the time you invest in your skincare routine will directly influence how smoothly your makeup applies and how long it stays put. The difference between makeup that looks cakey and patchy versus makeup that looks airbrushed often comes down to what you did — or did not do — in the minutes before you picked up a brush.
Prep & Skincare: Laying the Foundation for Flawless Makeup
Great makeup always starts with well-prepped skin. Before you apply a single drop of foundation, your skin needs to be clean, exfoliated, and properly hydrated. Cleansing removes dirt, oil, and any residue from your morning routine, creating a clean surface for makeup to adhere to. Use a gentle cleanser that matches your skin type — a foaming cleanser works well for oily skin, while a cream or gel-based cleanser is better suited for dry or combination skin.
Exfoliation is the next crucial step, but it should be done the night before your makeup application rather than right before. Over-exfoliating can cause micro-tears in the skin and leave your face slightly inflamed, which makes foundation cling to dry patches and look uneven. A gentle chemical exfoliant with salicylic acid or a soft microfiber cloth used the evening prior will smooth your skin texture without irritation. On the morning of your makeup application, simply splash your face with lukewarm water and pat dry.
Hydration is arguably the most important part of your prep routine. A lightweight, non-greasy moisturizer works to plump the skin and create a smooth surface for primer. If you have dry skin, look for moisturizers with hyaluronic acid or ceramides, which draw moisture into the skin and lock it there. For oily skin, a water-based gel moisturizer will hydrate without adding excess shine. Allow your moisturizer to fully absorb for a few minutes before moving on to primer — this waiting period makes a surprising difference in how evenly your base applies.
Base & Concealer: Building a Flawless Canvas
Your foundation is the cornerstone of your entire face-beating routine, and choosing the right shade and formula is non-negotiable if you want a natural-looking result. The golden rule for foundation matching is to test the product along your jawline rather than on the back of your hand. Your jawline is where your face meets your neck, and the right shade should disappear completely into this area without leaving a visible line of demarcation. If possible, test the shade in natural daylight to ensure it does not look too pink, too yellow, or too ashy against your natural skin tone.
Formula matters just as much as shade. If you have oily skin, a matte or oil-free foundation will control shine throughout the day. For dry or mature skin, a dewy or luminous formula adds hydration and prevents makeup from settling into fine lines. Combination skin benefits from a satin-finish foundation that provides light coverage without emphasizing dry patches or oily zones. When applying, start with a small amount and build coverage where you need it most — usually around the center of the face, where redness and discoloration tend to concentrate.
The debate between brushes, sponges, and fingers has raged for years, and the truth is that each tool has its advantages. Beauty sponges, when dampened, blend foundation seamlessly into the skin and give a flawless, airbrushed finish. Flat foundation brushes work well for building medium-to-full coverage quickly, while kabuki brushes offer buffing action that blends product deep into the skin texture. Fingers are perfectly acceptable for cream and liquid formulas because the warmth of your skin helps the product melt in naturally, though fingers can sometimes leave streaks if you are not careful. The tool you choose matters far less than how you use it — always blend in gentle circular motions and never drag the product across your face.
Eyes: Defining Your Gaze with Confidence
Eyeshadow application can feel intimidating, but it comes down to layering and blending in the right order. Start with an eyeshadow primer to ensure your shadow stays crease-free for hours — this step is especially important if you have oily lids, which tend to cause shadow to fade and slide within an hour of application. Once your primer is set, apply a transition shade — a medium-toned matte eyeshadow — in your crease area using a fluffy blending brush. This transition shade creates the foundation for depth and dimension, making every other shade you apply afterward look more professional.
Wing liner is one of those skills that separates a basic makeup look from a fully beaten one. If you are new to eyeliner, skip the felt-tip pens and start with a soft pencil that you can smudge and correct easily. For a classic wing, draw a small line extending outward from the outer corner of your eye at a slight upward angle, then connect it to the rest of your lashline with short, controlled strokes. Tilt your head back slightly and look down into a mirror — this position gives you a clearer view of your lashline and makes it easier to draw a straight, even line. Liquid liner pens with a fine tip offer the sharpest finish once you have built up your confidence.
Mascara is the finishing touch that opens up your eyes and ties your eye look together. Before applying, wipe off excess product from the wand to prevent clumping — a clean wand gives you better control and a more natural result. Wiggle the wand from side to side at the base of your lashes to deposit product at the roots, then sweep upward to the tips in a single smooth motion. For extra volume, wait about thirty seconds for the first coat to dry slightly, then apply a second layer. If you struggle with smudging, a tubing mascara formula wraps each lash in a lightweight polymer shell that resists humidity and oil without flaking.
Brows: Framing Your Face with the Perfect Arch
Your eyebrows are the frame around your face, and getting them right can completely transform your overall look. The first step in any brow routine is determining your natural shape and identifying where your brows need the most help. Use a spoolie brush to comb your brows upward and outward, then assess any sparse areas or gaps. The arch should sit roughly above the outer edge of your iris when you look straight ahead, and the tail of your brow should align with the outer corner of your eye.
When it comes to brow products, the best choice depends on your natural brow density and the look you want to achieve. Brow pencils are ideal for drawing individual hair-like strokes to fill in sparse areas with precision. Brow powders offer a softer, more natural finish and work well for filling in larger patches of thinness. Brow gels — both clear and tinted — are exc nt for setting your brow hairs in place and adding subtle fullness without adding too much color. A combination approach works well for many people: use a pencil or powder to fill in gaps, then set everything with a gel for all-day hold.
The most common brow mistake is overfilling, which results in brows that look drawn-on rather than natural. Work in light, feathery strokes and build coverage gradually, stepping back from the mirror frequently to check your overall balance. Your left and right brows should mirror each other approximately, though no one’s face is perfectly symmetrical. Brows that are slightly different from one another actually look more natural than brows that are identically sculpted, so do not obsess over achieving robot-like precision.
Cheeks: Sculpting, Coloring, and Highlighting for Dimension
Blush, bronzer, and highlighter are the trio that brings your face to life and gives it dimension beyond a flat base. Bronzer should be applied first, going lightly in the hollows of your cheeks and along the perimeter of your face where the sun would naturally hit. Use large, sweeping motions and a fluffy brush to blend the bronzer seamlessly into your foundation — it should look like a subtle sunkissed warmth, not a stripe of darker color sitting on top of your base makeup.
Placement is everything when it comes to blush. Cream blushes work best applied directly after foundation and before powder products, as they blend into the skin for a natural flush-from-within look. Powder blushes should be applied to the apples of your cheeks with a fluffy brush and blended upward toward your temples. Avoid placing blush too low on your cheeks or too far forward, as this can drag your face downward and make you look older. The sweet spot for most face shapes is on the apples of the cheeks, blended softly upward and outward.
Highlighter adds luminosity to the high points of your face where light naturally hits — the tops of your cheekbones, the bridge of your nose, your cupid’s bow, and the center of your forehead. A light hand is critical here, especially if you are new to highlighting. Swipe or dust the product onto these areas and blend with a light touch. Too much highlighter in the wrong places will look shiny rather than lit-from-within, and heavy highlighter on textured or acne-prone skin can emphasize pores and bumps. For everyday wear, opt for a subtle shimmer over a chunky glitter formula for a naturally radiant glow.
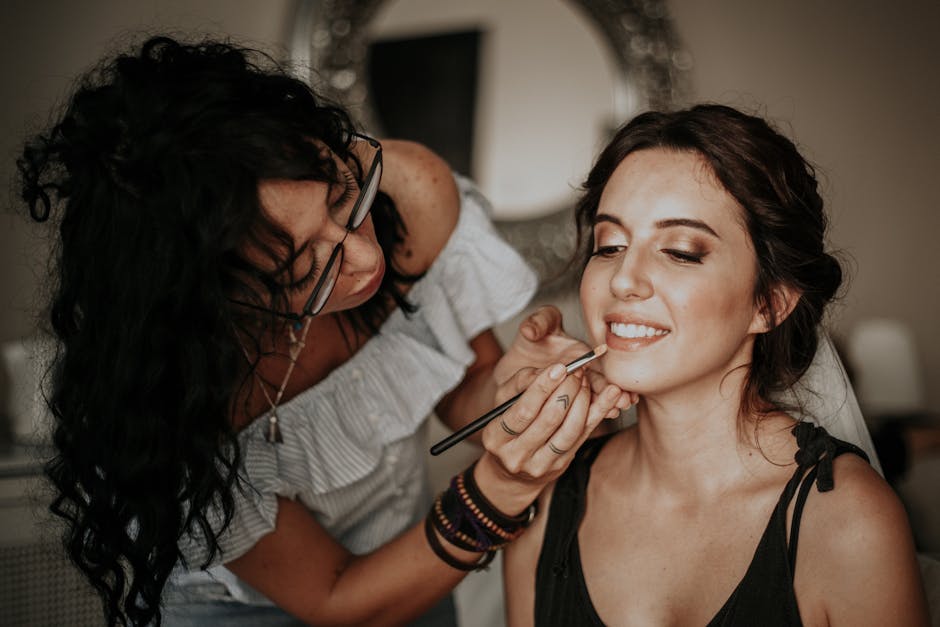
Lips: Perfecting Your Pout for a Polished Finish
Lip prep is often skipped, but it is what separates a smooth, even lip look from one that feathers, bleeds, or fades within an hour. Exfoliate your lips gently with a soft toothbrush or a dedicated lip scrub to remove any dry, flaky skin. Follow up with a hydrating lip balm and allow it to fully absorb before you reach for your lipstick. Well-hydrated lips create a smooth base that allows color to glide on evenly and prevents the product from settling into fine lines.
When applying lipstick directly from the tube, start at the center of your bottom lip and work outward toward each corner. For a more precise application, use a lip liner to map out your lip shape first — trace just outside your natural lip line for a fuller look, or stay right on the edge for a more understated finish. Fill in your lips with the liner before applying lipstick or gloss for a more intense, long-lasting color payoff. Lip gloss looks most flattering applied to the center of the lips and tapped with your finger to spread the product evenly without over-applying.
There are simple tricks to make your lips look fuller and more defined without relying on plumping glosses. Overlining your lips slightly with a nude liner that matches your skin tone can add perceived fullness, while a dab of highlighter or light concealer on the cupid’s bow catches light and makes your lip shape more pronounced. A lighter shade in the center of your bottom lip creates an optical illusion of fullness, while darker shades on the outer edges add dimension. The key is to keep the look balanced — if you go bold on the lips, soften your eye makeup slightly for a cohesive overall appearance.
Setting Spray: Locking in Your Beat for All-Day Wear
Setting spray is the final and arguably most underrated step in any face-beating routine. After you have spent time carefully applying and blending each layer of your makeup, setting spray seals everything in place and prevents your hard work from melting, fading, or transferring throughout the day. It works by creating a fine mist that dissolves the slightly powdery look that setting powders can leave behind and fuses all of your products together into a single, cohesive layer.
Choosing the right setting spray depends on your skin type and your daily needs. For oily skin, look for a mattifying formula that helps control shine and absorb excess oil throughout the day. For dry skin, a hydrating setting spray with ingredients like glycerin or aloe vera adds a layer of moisture that keeps your skin from feeling tight or cakey under your makeup. If you have combination skin, a balanced setting spray that is neither too dewy nor too matte will serve you well across different seasons and environments.
Application technique matters just as much as the product itself. Hold the bottle about eight to ten inches away from your face and mist in an “X” or “T” shape pattern across your face — spraying too close results in droplets that disrupt your makeup rather than setting it. Let your face air dry completely before touching it or adding any additional layers of product. A common mistake is applying setting spray immediately after powder and then touching your face before it fully dries, which can cause smudging and disrupt the setting process. Once dry, your makeup is locked in and ready to last through a full day of work, events, or whatever the day brings.
Frequently Asked Questions (FAQ)
What is face-beating in makeup?
Face-beating is professional makeup slang for applying and blending the full range of makeup products — from skincare prep through setting spray — to achieve a flawless, polished, camera-ready finish. It refers to the entire process of transforming a base look into a complete, cohesive glam appearance, with special attention paid to seamless blending and long-lasting application.
How long should my makeup last throughout the day?
A well-applied makeup look using quality base products and sealed with setting spray should comfortably last eight to ten hours on normal skin. Oily skin may experience some shine breakthrough after five to six hours, which can be touched up with blotting papers and a light dust of translucent powder. Skincare prep, primer, and setting spray are the three biggest factors in extending the wear time of your makeup.
Do I need to use all the products mentioned in this tutorial?
No, you do not need every single product listed to achieve a great makeup look. This tutorial covers the full spectrum of face-beating techniques, but you should customize your routine based on your personal preferences, skin type, and the occasion. A minimal everyday look might include only primer, foundation, concealer, mascara, and setting spray, while a special-event full glam incorporates every step. Start with the basics and add steps as you become more comfortable with your technique.
How do I prevent my makeup from looking cakey?
Cakey makeup typically results from applying too many layers, using too much product, or skipping hydration and skincare prep. The fixes are straightforward: make sure your skin is well-moisturized before applying makeup, use thin layers of product and build coverage gradually, avoid heavy powders on dry areas, and always blend your base thoroughly with a damp sponge or brush. Setting spray at the end of your routine also helps dissolve any remaining powdery texture and melds everything together for a natural finish.
Explore more makeup-tutorial guides on our site.
Top Product Recommendations
| Product Name | Rating | Key Feature | Est. Price | Action |
|---|---|---|---|---|
| Best Makeup Tutorial Pick | ★★★★★ | Top-rated overall | $25–$45 | Check Lowest Price on Amazon |
| Budget Makeup Tutorial Option | ★★★★☆ | Great for beginners | $12–$28 | Check Lowest Price on Amazon |
| Premium Makeup Tutorial Choice | ★★★★☆ | Pro-level results | $50–$90 | Check Lowest Price on Amazon |
Affiliate Disclosure: This post contains affiliate links. We may earn a commission if you buy through our links, at no extra cost to you.