
Prep & Skincare
A flawless makeup look starts long before you touch a brush. The secret professional makeup artists never skip? A well-prepped canvas. When your skin is clean, hydrated, and balanced, foundation glides on smoothly and stays put all day — no creasing, caking, or patchiness in sight. Skipping this step is the most common reason even the best products fail to deliver the results you want.
Begin every morning routine with a gentle cleanser suited to your skin type. If you have oily skin, look for a foaming or gel cleanser that cuts excess sebum without over-stripping. Dry or sensitive skin benefits from a creamy, hydrating formula that soothes while it cleans. After cleansing, apply a lightweight moisturizer to lock in hydration, followed by a primer that addresses your specific skin concerns — whether that’s enlarged pores, uneven texture, or dullness.
- **Cleanser**: Gentle, pH-balanced formula matching your skin type
- **Moisturizer**: Daily hydration to plump fine lines
- **Primer**: Pore-minimizing, color-correcting, or hydrating options
Give each layer at least 60 seconds to absorb fully before moving to the next. Rushing this phase is where most beginners go wrong. When skincare is done right, face-beating becomes effortless.
Base & Concealer
The base sets the tone for your entire look. Choosing the right foundation shade is arguably the most critical decision in this step — and it’s easier than you think. Test foundation along your jawline in natural daylight. The perfect match disappears into your skin without an orange or pink undertone. Avoid testing on your hand or wrist, where your skin tone differs from your face.
There are two main application techniques worth mastering. The **dabbing method** involves stippling product onto the face with a damp makeup sponge, pressing it gently into the skin for a dewy, skin-like finish. The **buffing technique** uses a dense foundation brush in circular motions to blend product seamlessly into the skin, ideal for medium to full coverage looks. Both methods work well — your desired finish dictates which one to reach for.
Concealer goes on after foundation for spot coverage, or before if you want a more brightened, full-coverage look. Use a shade one to two tones lighter than your foundation to highlight under the eyes in an inverted triangle shape, then blend with a small detail brush or sponge.
| Technique | Best For | Tool Needed |
|---|---|---|
| Dabbing / Stippling | Dewy, natural finish | Damp beauty sponge |
| Buffing / Circular | Medium to full coverage | Dense foundation brush |
| Concealer first | Full glam, brightening | Concealer brush |
| Concealer after | Light coverage, spot correcting | Small sponge or finger |
Always blend along the jawline and hairline to avoid harsh lines. Your neck and ears are part of the blend zone too.
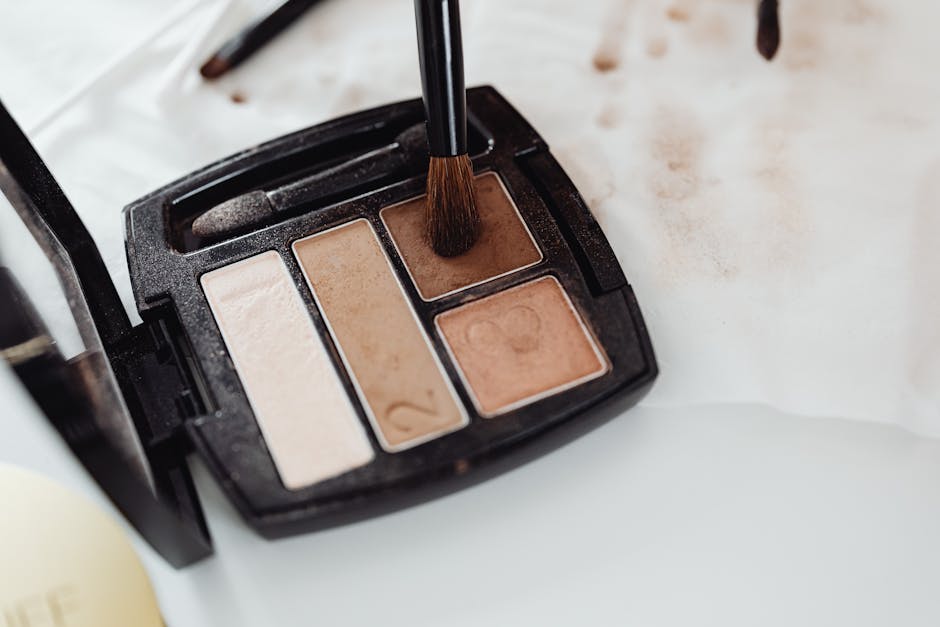
Eyes
The eyes are where face-beating gets exciting. A well-executed eye look can transform your entire face, which is why makeup artists spend the most time here. Before diving into color, apply an eyeshadow primer to prevent creasing and help pigments pop — this single step alone can double the wear time of your shadow.
For a glam eye look, build dimension with a three-shade palette. Start with a transition shade in your crease — a matte tone slightly darker than your skin — and blend it with a fluffy crease brush using small windshield-wiper motions. Next, pack a mid-tone shade onto the lid with a flat brush for opacity. Finally, use a smaller packing brush to place your darkest shade in the outer corner and along the lower lash line for depth.
Winged eyeliner intimidates a lot of beginners, but the trick is starting simple. Rest your elbow on a flat surface for stability, slightly tilt your chin, and use short, connecting strokes rather than one continuous line. If freehand feels tricky, use a stiff angled brush and a tape guide along the outer eye corner for a crisp, sharp wing every time.
- **Eyeshadow primer**: Prevents creasing, amplifies color payoff
- **Fluffy crease brush**: Blends transition shade into the crease
- **Flat lid brush**: Packs color onto the eyelid with precision
- **Pencil eyeliner or gel pot**: More control than liquid for beginners
For added drama, pair your shadow with false lashes or a quality volumizing mascara applied in zigzag motions from root to tip.
Brows
Brows frame your face and anchor every makeup look. Whether you prefer a bold, dramatic arch or a soft, natural shape, the principle stays the same: your brows should complement your eye shape and face structure without looking drawn-on or artificial.
The most forgiving products for beginners are eyebrow pomades and wax pomades. Pomade gives a sharp, defined finish ideal for bold looks, while wax keeps hairs in place with a softer, more natural appearance. For daily wear, eyebrow pencils offer quick fill-in and easy blending. Finish with a clear or tinted brow gel to lock every hair in place, especially if you have thick or unruly brows.
When filling in sparse areas, use short, hair-like strokes rather than heavy shading. Follow your natural brow shape — don’t try to reinvent it. A well-shaped brow follows the arch above your pupil and extends to a point that aligns with the corner of your nostril and the outer edge of your eye. Resist the temptation to over-pluck or over-draw; the fuller brow trend exists because a natural shape ages better and photographs better too.
| Product Type | Best For | Difficulty Level |
|---|---|---|
| Brow pomade | Defined, sharp arches | Intermediate |
| Brow pencil | Quick daily fill-in | Beginner |
| Brow wax / soap | Setting and lifting | Beginner |
| Tinted brow gel | Adding volume and color | Beginner |
Cheeks
Cheek color brings life and dimension to a full-glam face-beating look. The key to choosing the right blush and bronzer lies in understanding your skin’s undertone. Cool undertones (pink or rosy hints) pair beautifully with berry and mauve blushes. Warm undertones (yellow or golden hints) glow with peach, coral, and warm pink blushes. Neutral undertones have the widest range — nearly any shade works.
Apply blush to the apples of your cheeks first, then sweep slightly toward the temple for a lifted effect. Use a fluffy, angled blush brush and blend in circular or sweeping motions — never swipe straight across, which can create unblended streaks. Bronzer should be applied to the perimeter of your face where the sun naturally hits: the forehead, bridge of the nose, hollows of the cheeks, and along the jawline.
Contouring adds depth and structure, especially useful for photography and full-glam events. A matte bronzer or contour powder two shades darker than your skin works best for creating shadows under the cheekbones, along the sides of the nose, and at the jawline. Highlight with a glowy formula on the tops of the cheekbones, the cupid’s bow, and the brow bone for that three-dimensional, sculpted finish.
- **Cream blush**: Dewy, skin-like finish for dry to normal skin
- **Powder blush**: Buildable, soft finish for oily to combination skin
- **Matte bronzer**: Contouring and shadow creation
- **Shimmer highlight**: Glow effect on high points of the face
Lips
Lip color is the finishing statement of any face-beating look. Choosing the right shade comes down to your skin’s undertone and the vibe you want. Deep berry and plum shades flatter medium to deep skin tones beautifully. Soft nude tones with warm pink or peachy undertones work for fair to light skin. Neutral-warm terracotta and rose tones suit olive complexions exceptionally well.
For long-lasting color, exfoliate your lips with a gentle scrub 24 hours before applying bold lipstick — this removes dead skin that causes patchiness. Before applying any lip color, line your lips with a pencil that matches your chosen shade or is one shade deeper. This creates a base that extends wear time and prevents feathering along the edges.
Fill in the entire lip with the pencil first, then apply your lipstick on top. This layering technique locks color in for hours, even through coffee or meals. For a glossy glam moment, add a clear or tinted lip gloss in the center of the bottom lip only — this creates the illusion of fuller lips without looking overdone.
- **Lip liner**: Prevents feathering, extends wear time
- **Matte lipstick**: Long-wear, statement-making color
- **Satin or glossy lipstick**: Softer, everyday glam look
- **Lip primer or balm**: Hydrates and smooths before color application
Setting Spray
Setting spray is the final, non-negotiable step in any face-beating routine. Think of it as insurance for your entire look — it melts powder products into the skin, reduces transfer, and locks everything in place for extended wear. Without it, the beautiful work you’ve built up over the past hour begins to fade, crease, or slide by mid-day.
Not all setting sprays are the same. **Mattifying formulas** contain oil-control ingredients that minimize shine, making them ideal for oily or combination skin. **Hydrating or dewy setting sprays** contain ingredients like glycerin or aloe that add luminosity — perfect for dry skin types. **Long-wear setting sprays** are formulated with polymer technology that creates a flexible film over makeup, extending wear for eight hours or more.
Hold the bottle six to eight inches from your face and mist in a T-pattern — forehead, cheeks, chin, and down the nose. Let it dry completely without touching your face or fanning it. For extra staying power on hot days or long events, apply one mist before your primer and one mist as the final step for a double-lock effect.
| Skin Type | Best Setting Spray | Key Ingredient |
|---|---|---|
| Oily / Combination | Mattifying | Silica, witch hazel |
| Dry / Dehydrated | Hydrating / Dewy | Glycerin, aloe vera |
| Normal | Long-wear / All-day | Polymer film-formers |
| Sensitive | Fragrance-free, gentle | Chamomile, niacinamide |
Frequently Asked Questions (FAQ)
What is face-beating in makeup?
Face-beating is professional makeup slang for the full process of applying and blending makeup across your entire face for a complete, glamorous look. It encompasses every step from skincare prep through setting spray — not just one product or technique.
How often should I cleanse my makeup brushes?
You should deep-clean your brushes at least once a week using a gentle brush cleanser or baby shampoo. Quick daily washes with a spray cleanser between uses keep bacteria from building up and prevent product buildup that affects application quality.
What are some common mistakes people make when applying makeup?
The most common mistakes include skipping skincare prep, using the wrong foundation shade, over-applying product instead of building up gradually, skipping primer, and forgetting to blend along the jawline and hairline. Rushing the blend step and applying setting spray too close to the face are also frequent culprits that lead to creasing and uneven coverage.
Explore more makeup tutorial guides on our site.
Top Product Recommendations
| Product Name | Rating | Key Feature | Est. Price | Action |
|---|---|---|---|---|
| Top-rated eyeshadow primer | ★★★★★ | Editor-recommended eyeshadow primer from this guide | $18–$42 | Check Lowest Price on Amazon |
| Best-value foundation brush set | ★★★★☆ | Affordable foundation brush set — strong everyday results | $12–$28 | Check Lowest Price on Amazon |
| Premium brow pomade | ★★★★☆ | Higher-end brow pomade for visible, lasting results | $45–$95 | Check Lowest Price on Amazon |
Affiliate Disclosure: This post contains affiliate links. We may earn a commission if you buy through our links, at no extra cost to you.