
Nail Prep Basics: The Foundation for a Flawless Manicure
Before you even think about reaching for your favorite shade, proper nail prep is the single most important step in achieving salon-quality nails at home. Start by removing any old polish with a gentle nail polish remover that does not contain harsh acetone, which can dry out your natural nail plate. Wipe each nail clean until there is no residue left behind. Clean nails give color something to actually adhere to, and skipping this step is one of the most common reasons home manicures chip within a day or two.
Once your nails are clean and completely dry, it is time to shape them. Whether you prefer rounded ovals, classic squares, or trendy squoval shapes, use a quality nail file to gently shape each nail in one direction only — never saw back and forth, as that causes splitting and weakens the nail structure. If your nails are longer and need trimming, use clean nail clippers and file the edges smooth afterward. The goal is a uniform shape that feels comfortable and looks intentional across all ten fingers.
Gently push back your cuticles using a cuticle pusher or a soft orange stick wrapped in cotton. Do not force or over-push, as this can cause irritation or infection. Massaging cuticle oil around the nail bed before you begin helps soften the skin and makes this step much easier. After pushing back the cuticles, use a fine-grit buffer block to lightly buff the surface of each nail. This removes subtle ridges and oils so your base coat grips the nail properly. Finish by wiping each nail with a lint-free wipe dampened with rubbing alcohol for a pristine, squeaky-clean surface.
Perfecting the Base Coat: Your Nails’ Best Friend
Many home manicure enthusiasts skip the base coat entirely, treating it as an optional step when in reality it is the backbone of a long-lasting manicure. A dedicated base coat serves multiple purposes: it protects your natural nail from staining by darker or more pigmented polish colors, it creates a slightly sticky surface that helps color adhere better, and it smooths over any remaining microscopic imperfections on the nail surface. Without it, you are essentially painting directly onto bare nail, which leads to premature chipping, uneven color, and potential staining.
To apply base coat correctly, start with a very small amount on the brush — you can always add more. Begin at the center of the nail near the cuticle and sweep gently toward the free edge in one smooth stroke. Then go back and catch the left and right sides of the nail. The trick is to keep the coat ultra-thin, almost sheer. Thick base coat bubbles and peels. Cap the free edge of each nail by brushing a tiny amount of base coat over the tip — this seals the color in and dramatically extends wear time.
Different nail types benefit from different base coat formulas. If your nails are weak or splitting, look for a protein-enriched or hardening base coat with ingredients like keratin or calcium. If your nails are naturally oily and polish tends to lift, a dedicated grip primer or “sticky” base coat formula works wonders. Allow your base coat to dry completely before applying color — this usually takes two to three minutes depending on the formula and your room temperature. Rushing this step is the second most common home manicure mistake, right after skipping base coat altogether.
Choosing the Right Nail Color: Trends, Skin Tone, and Technique
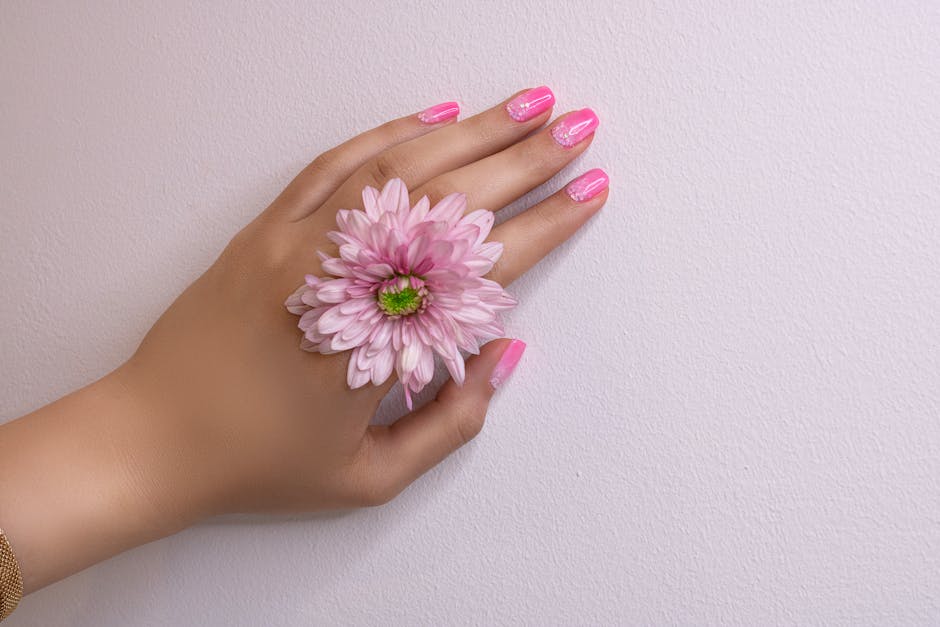
Nail color selection is where the fun really begins, and understanding a few key principles helps you choose shades that genuinely flatter you rather than simply following whatever is trending. Current nail color trends for US readers span from quiet luxury neutrals — think warm beiges, soft mauves, and creamy whites — to bold statement hues like deep oxblood, cobalt blue, and earthy terracotta. Seasonal shifts also matter: spring and summer tend toward pastels and warm corals, while fall and winter lean into moody burgundies, forest greens, and rich plums.
Picking a color that suits your skin tone comes down to understanding whether your complexion runs warm, cool, or neutral. Warm undertones typically look best with peach, coral, terracotta, and golden tan shades. Cool undertones are flattered by soft pink, berry, navy, and wine tones. If you are unsure, a classic mid-tone pink or a rosy nude works for almost everyone. Avoid colors that blend too closely with your skin, which can make nails disappear rather than enhance your overall look.
Regular nail polish and gel polish each have distinct characteristics. Regular polish is more forgiving during application, removes easily with standard remover, and allows for quick fixes if you make a mistake. Gel polish, on the other hand, requires curing under a UV or LED lamp and must be soaked off, but it delivers a thicker, glossier, chip-resistant finish that can last two to three weeks. For applying nail polish like a pro, always work in thin coats — two thin coats always beats one thick coat. Wait for each layer to dry before applying the next, and do not blow on your nails or use a fan, as airflow causes bubbles. A quick-dry spray or drop product can shave minutes off your total dry time safely.
Achieving a Smooth Top Coat: The Finishing Touch That Matters Most
The top coat is the unsung hero of every great manicure. It is the clear protective shield that locks in your color, adds dimension and shine, and most importantly, shields your beautiful work from chips, dents, and everyday wear. Without a top coat, even the most perfectly applied color will start to fade and peel within a day or two. Think of it as the varnish that turns a painting into a finished masterpiece — it is what transforms a good home manicure into one that actually lasts.
Applying top coat requires the same thin, even technique you used with base coat and color. Load your brush, sweep a thin layer over the entire nail surface including the free edge, and let it dry completely. Do not apply thick top coat thinking it will look shinier — thicker coats take longer to dry and are more prone to smudging. For the shiniest possible finish, apply your top coat while the color beneath is still slightly tacky rather than fully dry, which helps the layers fuse together into one seamless coating.
Quick-dry top coats are ideal for busy mornings when you need to get out the door fast. They contain ingredients that evaporate faster than traditional formulas, cutting dry time down to one or two minutes in many cases. Regular top coats, however, tend to deliver a harder, more durable finish that resists chips better over time. If you are someone who can sit still for ten minutes and let nails air dry, a quality regular top coat will generally outperform quick-dry versions in terms of longevity. Many home manicure experts keep both on hand: a quick-dry formula for convenience and a regular glossy top coat for special occasions when durability matters more.
Maintaining Your Perfect Nails: Tips to Extend Every Manicure
Getting your nails to look great is only half the battle — keeping them that way is where discipline comes in. The single most effective habit for extending your manicure is applying a fresh layer of top coat every two to three days. This replenishes the protective outer shield, fills in minor scratches, and keeps color looking freshly glossy. Carry a small top coat in your purse or bag for quick touch-ups whenever you notice the shine starting to fade.
Moisturizing your hands and nails daily is just as important as the polish itself. Dry hands and cuticles put stress on the nail plate, which can cause polish to lift at the edges. Apply a rich hand cream and massage cuticle oil into the nail bed at least once a day — ideally at night before bed so the product has hours to absorb. Oil and water actually repel each other, which is why you should apply cuticle oil before hand cream if you use both, allowing the oil to penetrate the nail and surrounding skin properly.
Minor chips and scratches happen to everyone, even with the best technique. The good news is you can fix small chips at home without removing the entire manicure. Lightly buff the chipped area with a fine-grit buffer, wipe clean, apply a thin layer of the same color, let it dry, and seal with a fresh top coat. This touch-up method can extend a manicure by several days. Generally, plan to fully remove and reapply nail polish every seven to ten days. Keeping polish on longer than two weeks risks it drying out the nail surface beneath, which leads to yellowing and brittleness over time.
Alternative Nail Treatments: Dip Powder, Gel, and Acrylic Options
If traditional nail polish is not quite giving you the durability or finish you want, alternative nail treatments offer compelling advantages. Dip powder systems have surged in popularity because they provide exceptional strength and long wear — often three to four weeks — without requiring a UV lamp. The process involves applying a bonding liquid, dipping the nail into colored powder, repeating for intensity, and sealing with a top coat. The result is a lightweight yet incredibly durable layer that does not chip easily. Dip systems are ideal for home use because the learning curve is gentler than gel and you do not need any special equipment beyond the kit itself.
Gel nail polish remains the gold standard for a glossy, chip-resistant salon-quality finish at home. The process requires a UV or LED lamp for curing each layer, but the end result is noticeably thicker and more durable than regular polish.Gel polish does not air dry — each layer must be cured under the lamp, which means investing in a quality lamp is non-negotiable for home gel enthusiasts. One major advantage of gel over dip powder is the ability to do fills rather than full removals, extending wear time and reducing damage to your natural nail.
Acrylic nails, while traditionally associated with salon visits, can be done at home with practice and the right products. Acrylics involve mixing a liquid monomer with a powder polymer to form a malleable ball that is sculpted onto the nail and hardens in air. They offer the most dramatic length and shape customization of any at-home nail system. However, acrylics require more skill, produce stronger fumes, and can cause more damage to natural nails if applied or removed improperly. After any alternative treatment, give your natural nails a break of at least a week between applications, hydrate them with nourishing oils, and consider applying a strengthening base coat during the rest period to restore any lost integrity.
Nail Art and Designs: Simple Techniques for Stunning Nails
Nail art does not have to be complicated or require professional training — some of the most elegant designs are surprisingly simple to execute at home with a little practice. Start with basic polka dots: all you need is a bobby pin or dotting tool. Dip the rounded end in polish and press gently onto the nail to create perfect circles in varying sizes. Combine two colors for a classic look, or use a contrasting metallic shade for something more dramatic. Simple stripe designs are equally approachable — use striping tape or thin nail art brushes to paint clean lines after the base color has dried.
The French manicure is a timeless design that flatters every nail shape and length, and it is entirely achievable at home with patience. Paint your nails with a sheer pink or nude base coat and let it dry completely. Then, using a French manicure tip guide or even a small piece of tape placed just below the nail tip, apply white polish in a thin curved line across the free edge. The key to a clean French tip is using very little polish on your brush and building the white line in thin, controlled strokes. Practice makes perfect, and the soft, natural elegance of a well-done French manicure is always worth the extra effort.
Nail stamps and decals have made intricate nail art accessible to anyone regardless of artistic skill. Stamping kits include a lacquer plate with engraved designs, a scraper, and a stamp applicator. Simply apply polish over the desired image on the plate, scrape off the excess with the flat scraper, roll the stamp over the design, and press it onto your nail. Decals and adhesive nail stickers work even more simply — peel and press onto dry polish, seal with top coat, and you are done. Essential tools for at-home nail art include a dotting tool, fine-detail brushes, striping tape, a buffer block, and a good quality clear top coat to seal everything in place and ensure longevity.
Frequently Asked Questions (FAQ)
How often should I change my nail polish?
Most nail professionals recommend fully removing and reapplying nail polish every seven to ten days. Keeping polish on longer than two weeks can cause it to dry out and become more prone to chipping, and the nail beneath needs a break to breathe and recover moisture. Between full changes, a fresh top coat every two to three days can extend the life of your manicure significantly.
Can I use regular nail polish with a gel top coat?
It is not recommended. Gel top coats are formulated to bond specifically with gel polish and require UV or LED curing. Applying a gel top coat over regular polish and curing it under a lamp may not bond properly, could cause bubbling, and in some cases the heat from the lamp may cause discomfort since regular polish lacks the protective base layers that gel typically includes. Stick to matching systems for the best results.
What is the best way to remove stubborn nail polish?
For regular polish, soak a cotton ball in remover, place it directly on the nail, and wrap the fingertip in aluminum foil for thirty to sixty seconds. This gives the remover time to dissolve the polish without excessive rubbing, which protects your nail surface. For gel, dip powder, or long-wear polishes, you need acetone-based remover and a longer soak of five to ten minutes. Gently scrape off softened product with an orange stick — never force it or pry at the nail.
How can I prevent my nails from becoming stained by dark nail colors?
The most reliable defense against staining is applying a quality base coat every single time, without exception. Base coats act as a barrier between the pigment in your nail color and the keratin of your natural nail. If you regularly wear deep, bold colors like reds, purples, or very dark shades, choosing a base coat specifically marketed as a stain blocker or one with a slight tint provides an extra layer of protection. Removing polish promptly rather than letting it sit for days also reduces staining risk considerably.
Explore more nails guides on our site.
Top Product Recommendations
| Product Name | Rating | Key Feature | Est. Price | Action |
|---|---|---|---|---|
| Best Nails Pick | ★★★★★ | Top-rated overall | $25–$45 | Check Lowest Price on Amazon |
| Budget Nails Option | ★★★★☆ | Great for beginners | $12–$28 | Check Lowest Price on Amazon |
| Premium Nails Choice | ★★★★☆ | Pro-level results | $50–$90 | Check Lowest Price on Amazon |
Affiliate Disclosure: This post contains affiliate links. We may earn a commission if you buy through our links, at no extra cost to you.