
How to Make Your Eyeshadow Last All Day
Nothing is more frustrating than spending time creating a gorgeous eye look only to watch it fade within a few hours. The reason eyeshadow breaks down so quickly comes down to a simple science: your eyelids produce natural oils throughout the day, and those oils act as a dissolving agent against the pigment sitting on your skin. When you apply eyeshadow directly over bare skin, there is nothing holding those particles in place, so the color slides, creases, and eventually disappears entirely.
The fix is surprisingly straightforward and starts with a dedicated eyeshadow primer. A primer creates a matte, slightly tacky barrier between your eyeshadow and the oils on your eyelid, essentially giving your pigment something to grip onto. Apply a pea-sized amount across your entire lid and allow it to set for about 30 seconds before you begin applying any color. That brief wait makes a significant difference in how well your shadow adheres. From there, pack your eyeshadow onto the lid using a pressing motion with a flat packing brush rather than sweeping it across the surface. Pressing forces the pigment into the primer and builds up rich, opaque color that lasts for hours.
For especially humid or warm conditions, layer a cream eyeshadow in a coordinating shade underneath your powder formula. This double-layer technique creates an incredibly strong bond that resists fading even through a full day of wear. Finish by spritzing your eyeshadow brush lightly with a setting spray before picking up color for an additional boost in longevity.
**Tools that help:**
- Eyeshadow primer in pen or tube format
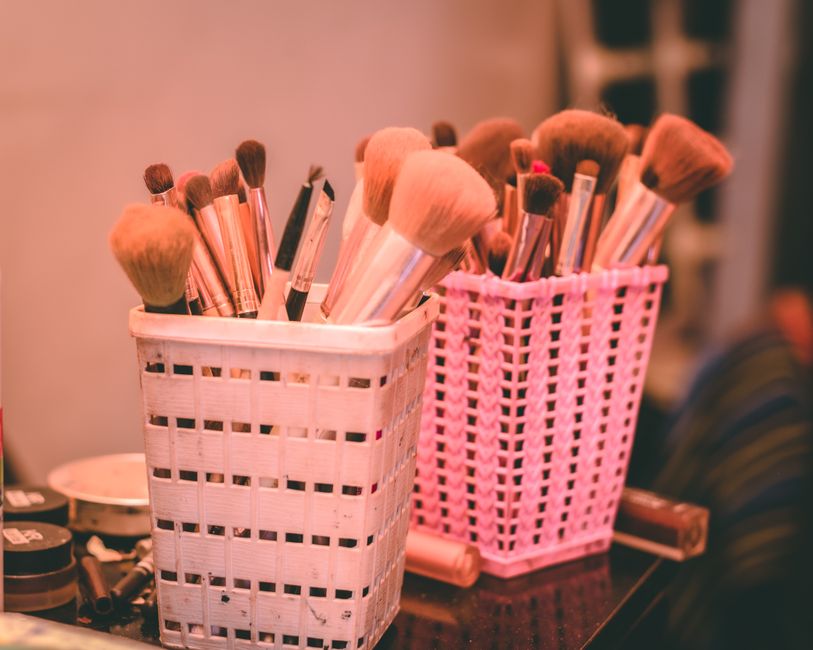
- Flat packing brush for maximum pigment payoff
- Makeup setting spray for setting shadow
The Secret to Perfect Winged Eyeliner Every Time
Winged eyeliner is one of those techniques that looks effortless when it works and absolutely disastrous when it does not. The most common reason winged liner fails is trying to draw the entire shape in one continuous stroke — this approach almost guarantees wobbly lines and mismatched wings. The secret that makeup artists have used for years is a geometric backwards method that makes symmetry nearly automatic.
Instead of starting at the inner corner of your eye, begin by drawing the wing itself. Place a small piece of tape at an angle from the outer corner of your eye toward the end of your eyebrow. This creates a clean guide for the wing. Draw a thin line along the edge of the tape from your lash line up to the tip, then connect that line back down to meet your lash line. Remove the tape and fill in any gaps. Because the wing is the most visible and prominent part of the look, getting it right first and building inward ensures symmetry every single time.
For tools, a felt-tip liquid liner pen gives you the sharpest, most precise line because the felt tip allows for controlled, steady pressure. Avoid traditional brush-tip pencils when attempting wings because the bristles flex and create uneven pressure. Set your completed liner by tracing over the line one final time with a matching eyeshadow shade — this locks the pigment in place and prevents transfer onto your upper lid.
**Tools that help:**
- Felt-tip liquid liner pen for precision lines
- Clear scotch tape as a wing guide
- Matching eyeshadow for setting liner
How to Make Your Lipstick Last Longer
There is nothing worse than applying a bold lipstick in the morning only to find it completely gone by lunch. The truth is that most standard lipstick formulas are designed for comfort rather than longevity, which means the oils and emollients that make them creamy also make them prone to sliding off your lips with every sip of coffee, bite of food, or casual conversation. Understanding this helps you choose the right approach to extend your wear.
The single most effective trick for making any lipstick last longer is a technique called lip layering. Apply your lipstick, then blot your lips with a single ply of tissue to remove the surface oils. Apply a second thin layer of the same shade on top, then blot again. This might seem counterintuitive because it reduces the initial color intensity, but the thin layers actually bond together to form a more resilient film that adheres to your lip skin rather than sitting on top of it. The result is a stain-like finish that lasts two to three times longer than a single thick application.
For an even more dramatic improvement in wear time, dust a barely-there layer of translucent powder over your lip color through a thin tissue. This technique mutes the shine, sets the pigment, and creates a matte finish that clings to your lips through eating and drinking. Alternatively, invest in a long-wearing liquid lipstick formula, which uses a different chemistry that actually bonds to your lip skin and dries down to a transfer-resistant film.
**Tools that help:**
- Translucent powder for setting lipstick
- Single-ply tissue for blotting
- Long-wearing liquid lipstick formulas
How to Contour Your Face with Makeup
Contouring works because it mimics the natural way light and shadow define your facial structure. When light hits a raised area like your cheekbones, it naturally brightens that zone, while the hollows and recesses of your face fall into shadow. By placing darker tones in the recessed areas and lighter tones on the raised areas, you create an optical illusion of depth and dimension that photographs and looks stunning in person.
The key to successful contouring is blending above all else. Any product, no matter how expensive or highly rated, will look muddy and obvious if it is not properly blended into the surrounding skin. Use a contour shade that is no more than two shades darker than your natural skin tone — going darker than that creates an unnatural stripe rather than a natural shadow. Apply your contour shade in the hollows of your cheeks by sucking in your cheeks and finding the natural indent, along your jawline to define the edge, and along the sides of your nose to slim its appearance.
Different face shapes require slightly different placement. Round faces benefit from contouring along the perimeter to create the illusion of a narrower shape, while square or angular faces should focus contour along the jawline to soften the angles. Heart-shaped faces look balanced when contour is applied to the temples and the sides of the forehead. Always blend with a damp makeup sponge or a fluffy blending brush using small circular motions for the most seamless, skin-like finish.
**Tools that help:**
- Contour palette with multiple shade depths
- Angled contour brush for jawline precision
- Damp makeup sponge for seamless blending
The Trick to Making Your Lashes Look Longer and Fuller
Many mascaras promise length and volume but fail to deliver because of how they are applied rather than the formula itself. The basic mistake most people make is pumping the mascara wand in and out of the tube before application — this forces air into the tube and dries out the formula, making it clump and flake rather than coat each lash evenly. Instead, gently twist the wand as you pull it out to load the bristles without pushing air back into the formula.
The most effective technique for maximum lash drama involves three simple steps applied in a specific sequence. First, wiggle the wand at the base of your lashes to deposit the most product where it creates the most impact — the root. Second, sweep the wand upward in a zigzag motion from root to tip, coating every lash. Third, wait 30 seconds for the first layer to set slightly, then apply a second coat before it fully dries. Building layers while the previous coat is still slightly tacky creates thickness and length without the clumpy look that happens when you apply too many coats over fully dried mascara.
For lashes that are naturally short or sparse, a lash primer applied before mascara acts as a white or clear base coat that extends each individual lash and gives the colored mascara something to grip onto. This two-step approach consistently produces more dramatic results than mascara alone and can add the appearance of several millimeters of extra lash length.
**Tools that help:**
- Volumizing mascara with wand design
- Lash primer for extending natural lashes
- Clean spoolie brush for separating lashes
How to Get the Perfect Cat Eye Look
The cat eye is closely related to winged eyeliner but presents its own unique challenges because the swooping curve requires more artistic precision. The most common mistake is making the wing too thick, which causes it to overwhelm the rest of the eye and look heavy rather than glamorous. A sharp, thin wing actually appears more dramatic and eye-opening because it draws the eye outward and upward, creating the illusion of a lifted eye shape.
The geometric approach that works best for cat eyes uses your lower lash line as a guide. Look straight into a mirror and identify the natural angle created by your lower lash line in the outer corner of your eye. Draw a line extending from that point upward and outward at the same angle — this creates a wing that is perfectly proportional to your specific eye shape. Connect that line to your upper lash line, then fill in the shape. This technique works for every eye shape because it uses your own natural anatomy as the template rather than imposing a one-size-fits-all shape.
For the smoothest possible curve, use a small brush with a pointed tip and a gel or cream liner rather than a stiff liquid pen. Gel formulas have a creamier texture that blends slightly when applied, softening any wobbles in your line before they set. If your hand tends to shake, brace your elbow against a flat surface and use your pinky finger as a stabilizing anchor against your cheek.
**Tools that help:**
- Gel eyeliner pot with small pointed brush
- Angled eyeliner brush for precise application
- Cotton swab for fixing small mistakes
How to Make Your Foundation Look Natural
A common misconception is that a natural-looking foundation means using less product or skipping certain steps entirely. The opposite is true — a truly natural finish comes from building thin layers with the right tools and taking the time to blend properly into areas that are easy to overlook, like the jawline, hairline, and ears. Foundation that stops abruptly at the jawline is one of the most obvious giveaways that you are wearing makeup.
The most important step for a natural-looking foundation is choosing the correct shade. Test foundation along your jawbone in natural daylight rather than on your hand or the back of your wrist — your jaw connects your face to your neck and is the most accurate place to find your true match. If the shade disappears into your skin at the jaw, it is the right choice. Using a foundation that is too light or pink-toned is one of the most common reasons foundations look obviously applied rather than skin-like.
Apply your foundation with a damp makeup sponge using a bouncing stippling motion rather than dragging or sweeping the product across your skin. Dragging stretches the product and creates uneven coverage, while stippling presses the foundation into your skin for medium, even coverage that looks like your own skin but better. Set your foundation with a very light dusting of translucent powder only in the areas that tend to get oily — applying powder across your entire face can make it look flat and mask-like.
| Foundation Finish Type | Best For | Avoid If |
|---|---|---|
| Dewy / Radiant | Dry or mature skin | Oily skin |
| Satin / Satin-Matte | Normal to combination skin | Very oily or very dry |
| Matte | Oily skin | Dry or textured skin |
| Sheer / Tinted | Minimal coverage days | Full coverage desired |
How to Apply Blush for a Natural Flush
Blush exists to mimic the natural flush of healthy circulation, but it goes wrong when people choose formulas and shades that have nothing to do with how blood actually moves through the skin. A natural flush appears most concentrated on the apples of the cheeks and fades as it extends toward the ear, so your blush application should follow that same pattern rather than sitting as a flat stripe of color across your face.
The secret to blush that looks like your own coloring is choosing a shade that mimics your natural undertone. If your skin has warm golden or peachy undertones, reach for coral, peach, or warm pink blushes. If your skin leans cool with pink or blue undertones, rosy mauve and berry shades will blend most naturally with your complexion. Applying a cool-toned blush on warm-toned skin creates an obvious makeup look because the colors fight rather than harmonize.
For application, smile naturally to locate the apples of your cheeks, then dust your blush in circular motions on that area. Blend the color upward and outward toward your temples using a large fluffy brush — this creates the gradient effect that looks most like a natural flush. Cream and liquid blushes tend to look the most skin-like because they melt into the skin rather than sitting on top of it, while powder blushes offer easier blendability and work best over a matte or lightly powdered base.
**Tools that help:**
- Large fluffy powder brush for diffused application
- Cream blush for dewy, skin-like flush
- Liquid blush for seamless blending
How to Make Your Eyebrows Look Perfectly Groomed
Brows frame your face and have an outsized impact on your overall appearance, which is why poorly shaped or over-drawn eyebrows are one of the most distracting makeup issues. The biggest mistake people make is filling their brows in with a single flat color rather than building dimension through light and dark areas that mimic natural hair growth patterns. Natural brows are never one solid color — they are darkest at the tail, thickest in the center, and lightest near the front.
The most effective technique for groomed brows starts with cleaning them up with a spoolie brush to separate the hairs and reveal any sparse areas or bald spots. Fill sparse areas with short, hair-like strokes using a pencil or pomade rather than shading the entire brow in solid color. This feathering technique creates the most realistic appearance because it mimics how individual hairs grow. Set your brows upward with a clear or tinted gel to keep them in place throughout the day.
For shape, resist the urge to over-pluck or follow trends that do not suit your face shape. The most universally flattering brow shape follows your natural bone structure — start the brow at the inner corner of your eye, peak at the arch above the outer edge of your iris, and end at the outer corner of your eye when looking straight ahead. This measurement technique works regardless of face shape and ensures your brows are balanced and proportionate.
**Tools that help:**
- Eyebrow pencil for hair-like strokes
- Spoolie brush for separating and grooming
- Tinted eyebrow gel for setting and adding volume
How to Make Your Makeup Last All Day in Hot, Humid Weather
Hot and humid weather is the enemy of long-lasting makeup because heat melts formulas and humidity introduces moisture into layers that are supposed to stay dry. Standard makeup routines that work perfectly in climate-controlled environments can completely dissolve within an hour when you step outside on a steamy summer day. Beating the elements requires adjusting both your product choices and your application technique.
The most important change in humid weather is switching to waterproof or water-resistant formulas for eye makeup and using a long-wear foundation that is specifically labeled as transfer-resistant or sweat-proof. Waterproof mascaras and liners resist the moisture from humidity and perspiration that causes standard formulas to smudge and migrate. For your base, a long-wear foundation combined with a setting spray that is labeled as humidity-resistant creates a protective film that actually repels moisture rather than absorbing it.
In terms of technique, apply your products in thin layers and resist the urge to build up heavy coverage during hot weather. Thick layers melt together under heat, while thin layers dry down individually and hold up better through sweat and humidity. Set your makeup with a light misting of setting spray, allow it to fully dry, then apply a second thin layer. This double-setting technique dramatically extends wear time without making your makeup feel heavy or look cakey.
**Tools that help:**
- Waterproof makeup formulas for humidity resistance
- Long-wear foundation for all-day coverage
- Setting spray for locking makeup in place
Frequently Asked Questions (FAQ)
What are some common makeup mistakes that can be easily fixed?
Most makeup mistakes fall into a few predictable categories that have straightforward solutions. Using the wrong shade for your skin tone is the most common and impactful mistake — always test foundation and concealer along your jawline in natural light before committing to a shade. Applying too much product is the second most frequent issue, and the fix is simple: start with thin layers and build up coverage gradually. The third common mistake is poor blending, which leaves visible lines and harsh edges. Using a damp makeup sponge and blending in small circular motions resolves most blending issues immediately.
How can I make my makeup look more natural?
Natural-looking makeup starts with choosing the right products for your skin type and undertone. Sheer-to-medium coverage foundations, cream-based formulas, and products labeled as natural or dewy finishes tend to look the most skin-like. Apply makeup in thin layers rather than one heavy application, and always blend into your jawline and hairline so there is no visible edge where the makeup stops. Using a damp makeup sponge for application rather than a dense brush also creates a more skin-like finish by pressing the product into your skin rather than laying it on top.
What are some makeup hacks that can help me save time in the morning?
Streamlining your routine is the most effective time-saving strategy. Use multi-tasking products like tinted moisturizers that combine hydration, coverage, and sun protection in one step, or cream blush sticks that work on cheeks, lips, and even eyelids without needing separate products. Keep your brushes and tools clean so they apply product efficiently without fighting against residue buildup. Finally, organize your products in the order you use them so you are not searching through drawers every morning — a simple morning routine that takes ten minutes consistently is far more efficient than a complicated routine you do not have time to complete.
Top Product Recommendations
| Product Name | Rating | Key Feature | Est. Price | Action |
|---|---|---|---|---|
| Top-rated eyeshadow primer for long wear | ★★★★★ | Editor-recommended eyeshadow primer for long wear from this guide | $18–$42 | Check Lowest Price on Amazon |
| Best-value felt tip liquid eyeliner pen | ★★★★☆ | Affordable felt tip liquid eyeliner pen — strong everyday results | $12–$28 | Check Lowest Price on Amazon |
| Premium long wearing liquid lipstick | ★★★★☆ | Higher-end long wearing liquid lipstick for visible, lasting results | $45–$95 | Check Lowest Price on Amazon |
Affiliate Disclosure: This post contains affiliate links. We may earn a commission if you buy through our links, at no extra cost to you.