
Prepping Nails for At-Home Manicure
Achieving professional-looking **nails** starts with proper preparation. Begin by removing any existing polish using a gentle, acetone-free remover that won’t dry out your nail beds. Soak a cotton pad and hold it against each nail for a few seconds before wiping away the color.
Once your nails are bare, wash your hands thoroughly with warm water and antibacterial soap. This removes oils, dirt, and residue that could interfere with polish adhesion. Pat your hands completely dry before moving to the next step.
Trim your nails to your desired length using sharp nail clippers, cutting straight across to prevent ingrown edges. File in one direction only—never saw back and forth—using a fine-grit file to smooth the edges and shape your tips. For cuticle care, gently push back softened cuticles with a wooden stick after soaking your fingertips in warm water for three to five minutes.
Quick pick: Compare top-rated Nails options.
Applying Base Coat for Stronger Nails
A quality **base coat** creates a smooth surface and protects your natural nails from staining. Look for formulas containing strengthening ingredients like keratin, calcium, or biotin that reinforce thin or weak nails. Ridge-filling base coats work especially well if you have textured nail surfaces.
Apply base coat in thin, even strokes starting from the center of your nail and working outward to the edges. One coat is typically sufficient, but you can add a second layer if your nails are particularly porous or damaged. Allow each layer to dry completely before proceeding.
Quick-dry base coats save time and reduce smudging risk, making them ideal for busy schedules. Regular formulas take longer to set but often provide better adhesion and wear time. Consider your lifestyle and patience level when choosing between the two types.
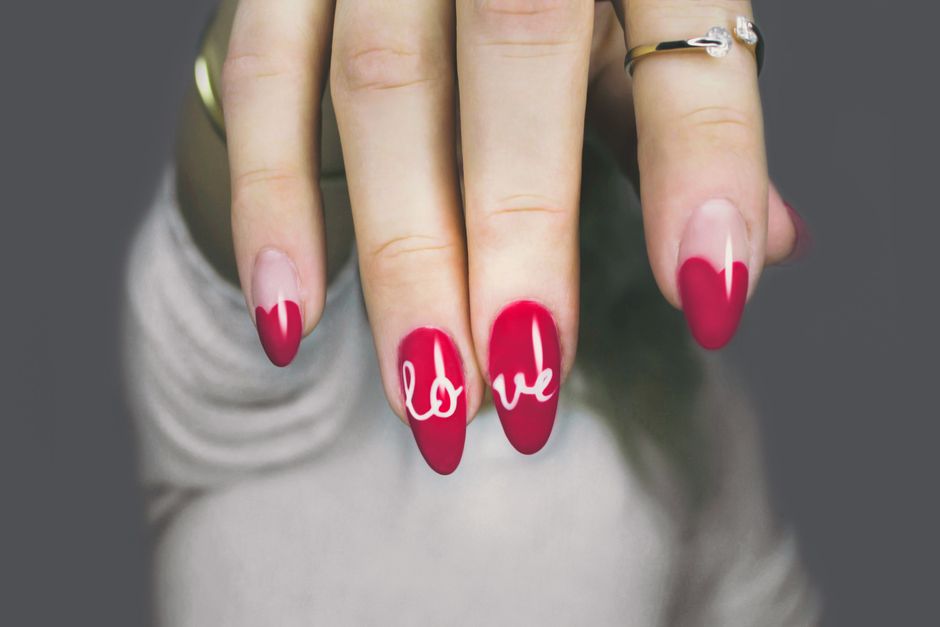
Finding the Perfect Nail Color
Selecting flattering shades depends on understanding your skin’s **undertone**. Cool undertones pair beautifully with blue-based reds, purples, and silvers, while warm undertones shine in coral, peach, and gold-toned polishes. Neutral undertones can wear virtually any color family with confidence.
Current trends favor earthy neutrals like terracotta and sage green, along with classic reds and unexpected metallics. Sheer milky shades and French manicure variations remain timeless choices. Don’t be afraid to experiment with seasonal palettes that reflect your personal style.
Gel polish offers chip-resistant wear for two to three weeks but requires UV lamp curing and careful removal. Regular polish allows easier color changes and doesn’t need special equipment, though it typically lasts only five to seven days. Weigh convenience against longevity when deciding which formula suits your needs.
Applying Nail Polish Like a Pro
Before opening your polish bottle, roll it between your palms rather than shaking it vigorously. Rolling prevents air bubbles that create uneven texture on your nails. Wipe excess polish from the brush against the bottle neck, leaving just enough product for smooth application.
Apply color using three strategic strokes: one down the center, then one on each side. Start slightly away from your cuticle line to avoid flooding, then gently push the brush toward the base in a curved motion. Two thin coats always look better than one thick coat that takes forever to dry.
Finish with a glossy **top coat** that seals in color and adds brilliant shine. Wrap the free edge by swiping the brush across the nail tip to prevent premature chipping. Allow at least two minutes between each layer for proper drying and curing.
Maintaining Healthy Nails
Daily hydration keeps nails flexible and prevents painful splitting. Massage cuticle oil or rich hand cream into your nail beds every evening, paying special attention to the cuticle area. Look for formulas containing vitamin E, jojoba oil, or shea butter for maximum nourishment.
Protect your nails from harsh chemicals by wearing gloves during cleaning tasks or dishwashing. Avoid using your nails as tools to open packages or scrape off labels. These habits cause micro-tears that weaken the nail plate and lead to breakage.
**Common nail problems** require targeted solutions. Yellow discoloration often results from dark polish worn without base coat—use a buffing block gently to restore clarity. Brittleness usually indicates dehydration, so increase your water intake and apply moisturizer more frequently. White spots are typically caused by minor trauma and will grow out naturally.
Alternatives to Traditional Nail Polish
**Dip powder** systems create durable manicures lasting three to four weeks without UV exposure. You brush on a bonding liquid, dip your nail into colored powder, then seal with activator and top coat. This method strengthens natural nails while providing vibrant, long-lasting color.
At-home gel systems let you achieve salon results with LED or UV lamps designed for home use. Apply gel base, cure under the lamp, add color coats with curing between layers, then finish with gel top coat. Remove gel safely by soaking nails in acetone-wrapped foils for ten to fifteen minutes rather than peeling or picking.
Acrylic nails extend length and durability but require careful application to avoid damaging the natural nail underneath. If you choose acrylics, ensure proper prep work including light buffing—never aggressive filing that thins the nail plate. Take breaks between applications to let your natural nails recover and breathe.
Extending Your Manicure’s Lifespan
Reapply top coat every two to three days to refresh shine and seal any micro-chips before they spread. This simple maintenance step can double your manicure’s wear time. Keep a bottle of your **top coat** in your purse or desk drawer for quick touch-ups.
Avoid hot water for at least two hours after painting your nails, as heat causes polish to expand and lift from the nail bed. Similarly, skip the gym immediately after your manicure since sweaty hands compromise adhesion. Plan your beauty routine around these timing considerations.
When chips do appear, resist the urge to peel off the polish. Instead, file the rough edge smooth, dab on a bit of matching color, then seal with top coat. This spot-fix approach maintains a polished appearance until your next full manicure.
Troubleshooting Common Application Issues
Bubbles in dried polish usually stem from shaking the bottle or applying coats too quickly. Always roll polish between your palms and wait two full minutes between layers. If bubbles appear, smooth them gently with top coat rather than adding more color.
Streaky coverage happens when polish is too thick or the brush is overloaded. Thin formula slightly by leaving the bottle open for a few seconds, or add a drop of polish thinner—never nail polish remover. Use lighter pressure when applying color to prevent dragging.
**Smudging** frustrates even experienced home manicurists. Speed drying drops help, but nothing beats patience. Wait at least ten minutes before resuming normal activities, and avoid touching your nails to any surface for the first five minutes. Quick-dry top coats significantly reduce waiting time without compromising finish quality.
Frequently Asked Questions (FAQ)
What’s the best way to remove nail polish without damaging my nails?
A: Choose acetone-free removers formulated with moisturizing ingredients to prevent excessive drying. Soak a cotton pad with remover and press it against your nail for five to ten seconds before gently wiping away polish. Follow up immediately with cuticle oil or hand cream to restore moisture. For stubborn glitter or dark colors, try the foil wrap method: place a remover-soaked cotton pad on each nail, wrap with aluminum foil, wait five minutes, then slide off the polish.
How often should I change my nail polish to keep my nails healthy?
A: Give your nails a polish-free break for at least three to five days every few weeks to let them breathe and recover. During this time, focus on intensive hydration treatments using cuticle oil twice daily and a strengthening treatment at night. Your nails don’t actually need to “breathe” through the surface, but the break prevents continuous chemical exposure and allows you to assess their natural condition and address any developing problems.
Can using a top coat really make a difference in how long my nail polish lasts?
A: Absolutely—a quality top coat is essential for extended wear. It creates a protective barrier against chips, adds glossy shine, and seals the color layers beneath. Reapplying top coat every two to three days refreshes your manicure and can extend its life from five days to two weeks. Look for quick-dry formulas with chip-resistant technology, and always wrap the free edge of your nail when applying to prevent tip wear.
Top Product Recommendations
| Product Name | Rating | Key Feature | Est. Price | Action |
|---|---|---|---|---|
| Best Nails Pick | ★★★★★ | Top-rated overall | $25–$45 | Check Lowest Price on Amazon |
| Budget Nails Option | ★★★★☆ | Great for beginners | $12–$28 | Check Lowest Price on Amazon |
| Premium Nails Choice | ★★★★☆ | Pro-level results | $50–$90 | Check Lowest Price on Amazon |
Affiliate Disclosure: This post contains affiliate links. We may earn a commission if you buy through our links, at no extra cost to you.