
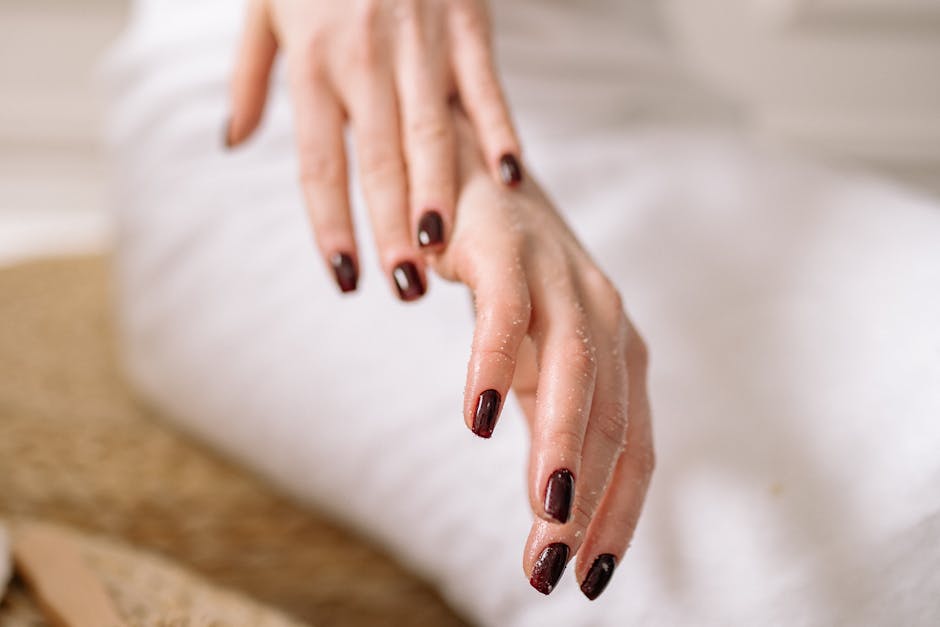
Nail Prep & Cuticle Care
The foundation of any great manicure starts long before you open a bottle of nail polish. Proper nail prep and cuticle care are what separate a chip-prone, short-lived manicure from one that looks freshly done for a full week or more. Skipping this step is the single most common reason at-home manicures fail prematurely.
Start by removing any old polish completely with a acetone-free nail polish remover if your nails are dry or brittle. Gently clean the nail surface with a lint-free wipe to eliminate any oils, lotion residue, or debris that could prevent polish from adhering properly. This quick prep step takes under a minute and makes a night-and-day difference in how long your color stays intact.
For cuticle care, soak your fingertips in warm water for two to three minutes to soften the skin, then gently push the cuticles back with a rubber-tipped cuticle pusher. **Never clip your cuticles** — this risks infection and can cause the nail plate to separate. Instead, apply a nourishing cuticle oil or cream daily to keep the area hydrated and healthy. Products like cuticle oils containing vitamin E or jojoba are exc nt choices for at-home care routines. Keeping cuticles moisturized prevents hangnails, cracking, and jagged edges that ruin a clean manicure look.
Key Tools for Prep
- Acetone-free nail polish remover
- Lint-free wipes or cotton pads
- Rubber-tipped cuticle pusher
- Cuticle oil or cream with vitamin E
- Small bowl for warm water soak
—
Shaping Nails
The shape of your nails affects everything from their visual appearance to how prone they are to snagging or breaking. Choosing the right shape for your finger width, nail bed length, and lifestyle is one of the most important decisions in your at-home manicure process.
**Square nails** work well for longer nail beds and give a clean, polished look that pairs beautifully with bold or neutral polish shades. Use a coarse nail file (180-grit) and file in a single direction only — never back-and-forth, which causes splitting and weakening. Round files are ideal for shaping square edges smoothly.
**Oval nails** are the most durable shape for shorter nails and active hands, as the rounded edges are less likely to catch on fabrics, hair, or materials throughout your day. **Almond nails** elongate the fingers and create an elegant, tapered silhouette, though they require a bit more filing precision and are best suited for medium-length nails.
After shaping, use a fine-grit buffer (400-grit or higher) to smooth the nail surface gently. **Avoid over-buffing** — removing too many nail layers weakens the plate and makes polish adherence more difficult. A light pass across each nail removes ridges and creates a slightly matte surface that grips base coat better.
—
Applying Base Coat
Base coat is non-negotiable in any professional-quality at-home manicure, yet it is the step most often skipped by beginners. A quality base coat serves three essential functions: it protects the natural nail from staining, it creates a slightly textured surface that polish adheres to, and it extends the life of your color by preventing chipping from the very first day.
When selecting a base coat, consider your nail type. If your nails are weak or prone to splitting, choose a **protein-enriched base coat** with ingredients like keratin or calcium. If staining from dark polish shades is your concern, a **ridge-filling base coat** smooths the nail surface while providing a protective barrier. For nails that are naturally oily or smooth, a **bonding base coat** with extra adhesion promoters ensures your color does not peel prematurely.
Apply base coat in two thin strokes — one down the center and one along each side — keeping a small margin around the cuticle and sidewalls. Thin coats dry faster and adhere better than one thick coat. Allow each layer to dry fully before moving to color application. This thirty-second pause between steps is what separates a long-lasting manicure from a messy one.
—
Choosing & Applying Color
Finding the perfect nail polish shade for your skin tone transforms the entire look of your manicure. The goal is not just a color you like — it is a color that makes your hands and skin look their best.
For fair or cool-toned skin, soft pinks, mauves, baby blues, and berry shades complement the natural undertones without washing you out. Medium skin tones pair beautifully with rose, coral, warm reds, and deep plum. Deep skin tones glow with rich jewel tones — emerald, sapphire, burgundy, burnt orange, and deep chocolate browns deliver the most striking contrast.
When applying color, start with a single drop of polish at the base of the nail and drag it toward the tip in one smooth motion. Apply a second thin coat for full opacity, wrapping the free edge of the nail to prevent premature chipping from the tip. **Work in natural light** or under a daylight lamp to spot missed spots and uneven coverage before the coat dries.
High-quality nail polishes labeled as **long-wearing** or **gel-inspired** formulas typically contain stronger pigments and better adhesion agents than budget options, making them worthwhile investments for at-home use. Brands vary, but look for polishes marketed as chip-resistant or with a **high-shine formula** for the most professional results.
—
Finishing with Top Coat
Top coat is the invisible armor that seals your entire manicure. Without it, even the most perfectly applied color dulls within a day, chips faster, and lacks the glossy, wet-look finish that makes a manicure look salon-done.
A quality top coat adds shine, protects color from daily wear and UV exposure that causes fading, and actually accelerates the drying time of the layers beneath it. Apply top coat in a single smooth stroke down the center of each nail, then quickly roll the brush to coat the free edge. **Cap the free edge** on every single nail — this single technique can double the life of your manicure.
For those who want gel-quality durability without a UV lamp, **no-light gel top coats** are an exc nt at-home alternative. These formulas cure air-dry and deliver a thick, glass-like shine that mimics a salon gel finish. Traditional solvent-based top coats remain the standard for most home manicures and are compatible with any regular nail polish beneath them.
—
Gel and Dip Powder Alternatives
Traditional gel and dip powder manicures deliver exceptional longevity — two weeks or more without chips — but require professional removal or specialized tools that many at-home users find inconvenient. Fortunately, several alternatives bridge the gap between convenience and durability.
**No-light gel polish systems** use a specially formulated gel color that air-dries to a hard, chip-resistant finish without a UV lamp. These systems include their own base and top coat designed to work together, and removal is as simple as soaking in acetone — no scraping or drilling needed.
**Dip powder kits** have surged in popularity as a middle ground between traditional polish and salon gel services. The process involves applying a bonding base, dipping the nail into a fine acrylic powder, and sealing with a top coat. Dip systems can last three to four weeks and are significantly gentler on the nail plate than gel if applied correctly. They do require practice to master the dipping technique without creating a thick, uneven buildup.
| Manicure Type | Durability | Drying Time | Removal Method | Skill Level |
|---|---|---|---|---|
| Regular polish + top coat | 3–5 days | 30–60 min air dry | Acetone soak (5 min) | Beginner |
| No-light gel | 7–10 days | Air dry (10–15 min) | Acetone soak (10 min) | Beginner–Intermediate |
| Dip powder | 3–4 weeks | Air dry between layers | Acetone soak (15 min) | Intermediate |
| Traditional gel (UV lamp) | 2–3 weeks | UV cure per layer | File + acetone soak | Intermediate–Advanced |
—
Nail Maintenance & Repair
A stunning manicure requires upkeep, and knowing how to maintain your nails between full redo sessions keeps your hands looking polished and professional at all times. Prevention and quick repairs are the two pillars of great nail maintenance.
To prevent chips, apply a fresh layer of top coat every two to three days over the existing color. This reseals the shine and adds a new protective layer without requiring a full manicure redo. Keep a **small maintenance kit** in your bag — a travel-sized top coat, a single-file emery board, and a few cotton pads — so you can address minor chips the moment they happen.
For small chips on the fly, smooth the rough edge with an emery board and apply a tiny drop of the same polish color over the chip. Let it dry, then seal with top coat. For larger chips or scratches, gently buff the affected area and apply a thin layer of base coat before color and top coat to restore a seamless surface.
Daily cuticle oiling remains the single most effective habit for long-term nail health. Dry, brittle nails chip far more easily than hydrated, flexible ones. Supplements containing **biotin** or **collagen** also support nail growth and strength when used consistently over several months. If your nails consistently peel or split, consider switching to a base coat formulated specifically for strengthening.
—
Frequently Asked Questions (FAQ)
What are the most common mistakes people make when doing their nails at home?
The three most frequent at-home manicure mistakes are skipping base coat, filing nails in a back-and-forth sawing motion, and applying thick coats of polish instead of thin ones. Base coat is essential for adhesion and stain protection. Filing back and forth creates micro-fractures in the nail plate that lead to splitting. Thick polish never dries evenly and peels within hours. Thin, smooth coats dry fast and wear much longer.
How often should I change my nail polish colors to avoid staining?
Dark and deeply pigmented polish shades — particularly reds, blacks, and deep purples — can stain the natural nail plate if left on for extended periods. **Change your polish every five to seven days** for best nail health, and always apply a base coat before any dark shade. If staining does occur, it typically grows out within four to six weeks, and a ridge-filling base coat can temporarily smooth the appearance while you wait.
What can I do to make my at-home manicure last longer?
Five habits dramatically extend manicure longevity: always use base coat, cap the free edge with every layer, apply a fresh top coat every two to three days, moisturize cuticles daily without getting oil on the polish itself, and wear gloves when doing dishes or cleaning with harsh chemicals. These small steps routinely push manicure wear from three days to a full week or more without any special products.
Top Product Recommendations
| Product Name | Rating | Key Feature | Est. Price | Action |
|---|---|---|---|---|
| Top-rated nail prep cuticle oil | ★★★★★ | Editor-recommended nail prep cuticle oil from this guide | $18–$42 | Check Lowest Price on Amazon |
| Best-value nail file and buffer kit | ★★★★☆ | Affordable nail file and buffer kit — strong everyday results | $12–$28 | Check Lowest Price on Amazon |
| Premium base coat for nails | ★★★★☆ | Higher-end base coat for nails for visible, lasting results | $45–$95 | Check Lowest Price on Amazon |
Affiliate Disclosure: This post contains affiliate links. We may earn a commission if you buy through our links, at no extra cost to you.